The latest trend in UA camera systems is an ability to record in 10bit file formats, as well as in LOG formats, which allow the use of Look-Up Tables (LUTs, often pronounced “Loots” and more generally pronounced “luhts”), providing significantly greater dynamic range. This greater dynamic range enables color matching, greater opportunity to color correct with higher quality formats such as those offered by Sony, Blackmagic Design, Canon, and others. Video does not have to be recorded in LOG to use a LUT, but using an input LUT on a semi-saturated frames could generate undesirable results.
WHAT IS A LOOKUP TABLE?
A LookUp Table (LUT) is an array of data fields which make computational processes lighter, faster moving, and more efficient. They are used in a number of industries where intense data can be crunched more efficiently based on known factors. For purposes of video, a LUT enables the camera to record in a LOG format, enabling deep color correction, compositing, and matching. There are many LUTs available, some are camera-specific while others are “general” LUTs that may be applied per user preference. A LUT might more easily be called a “preset color adjustment” which we can apply to our video at the click of a button. Traditionally, LUTs have been used to map one color space to another. These color “presets” are applied after the video has been recorded, applied in a non-linear editing system such as Adobe Premiere, Blackmagic Resolve, Magix Vegas, etc.
Two types of LUTs are part of production workflows;
- Input LUTs provide stylings for how the recorded video will look in a native format (once applied to specific clips). Input LUTs are generally applied only to clips/events captured by a specific camera. Input LUTs are applied prior to the correction/grading process.
- Output/”Look LUTs” are used on an overall production to bring a consistent feel across all clips. “Look” LUTs should not be applied to clips or project until after all color correction/grading has been completed.
There are literally thousands of pre-built LUTs for virtually any scene or situation. Many are free, some (particularly those designed by well-known directors or color graders) are available for purchase.

In addition to Input/Look LUTs, there are also 1D and 3D LUTs. 1D LUTs simply apply a value, with no pixel interaction. 1D LUTs are a sort of fixed template of locked values. 3D LUTs map the XYZ data independently, so greater precision without affecting other tints are possible. For a deeper read on 3D vs 1D LUTs, here is a great article written by Jason Ritson.
HOW DOES A LUT WORK?
This is a fairly complex question that could occupy deep brain cycle time. In an attempt to simplify the discussion, let’s begin with the native image.
Natively, the camera applies color and exposure based on the sensor, light, and a variety of calculations. This is the standard output of the majority of off-the-shelf UA systems. This type of output is ideal for video that is not going to be heavily corrected, will be seen on the typical computer monitor or television display, and time is of the essence. These are referred to as “Linear Picture Profiles” and is the most common means of recording video. Cell phones, webcams, and most video cameras record in linear format. While this is most common, it also reduces flexibility in post due to dynamic range, bit-depth, and other factors. In linear profiles, the typical 8bit video has 256 values of color, represented equally across the color spectrum. The balance (equality) of pixel ranges does not allow the most effective use of dynamic range, limiting correction options in post. With linear picture profiles, bottom end/dark colors use equal energy as brighter exposures, so while color balance is “equal,” it is inefficient and does not allow the greatest range to be displayed for the human eye, specifically midtones and highlights.
To take the best advantage of a LUT, video should be recorded in a LOG format. It’s rare an editor would apply a LUT to linear video, as in most cases, color space, exposure, and dynamic range would be unrealistic and challenged.
LOG formats store data differently than linear picture profiles.
In the past, LOG formats were only accessible in very high-end camera systems such as the Sony CineAlta Series, and similar, high-dollar products. Today, many UA cameras offer access to LOG formats.
When the camera recording parameters are set to LOG (Logarithmic) mode, these native color assignments are stripped away, and the camera records data in a non-linear algorithm.
LOG applies a curve in the bottom end of the image (darks/blacks) and shifts the available space to the more visible areas of the color range where it is more efficient/effective.
Of course, this will create the illusion of a low-contrast, washed-out image during the recording process.
| A-LOG image direct from camera | LUT applied, no additional grading |
“A-LOG” is Autel Robotics logarithmic recording format. A-LOG not only allows for greater dynamic range, it is also a 10-bit format, enabling much greater chroma push when color correcting or grading. Most manufacturers offer their own LOG formats.
| Graded image | Split screen comparing LUT, grade, and source image |
Virtually every editing application today features the ability to import LUTs to be used with 8- 10-, or 12-bit LOG files. Autel and DJI are the two predominant UA manufacturers offering LOG capability to their users, and any medium lift UA that can mount a Sony, Canon, Blackmagic Design camera also would benefit from shooting in a LOG format.
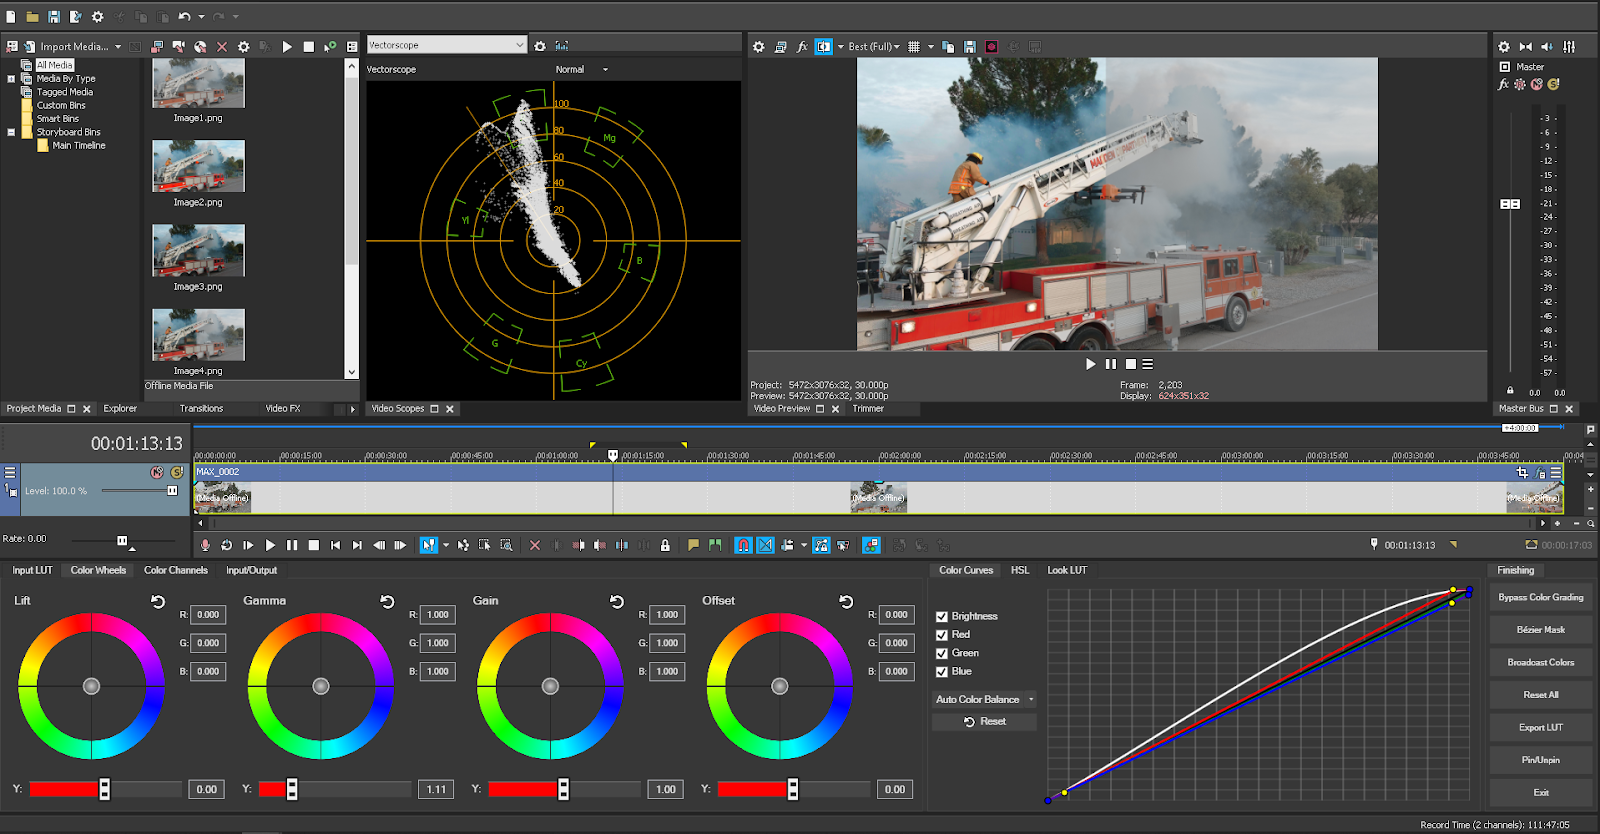
| Magix Vegas allows import of LUTs, and offers the ability to save a color correction profile as a LUT to be re-used, or shared with others. |
SHOULD I BE SHOOTING IN LOG-FORMAT?
Shooting video in LOG is much like choosing between .DNG or .JPG. If images/video are to be quickly turned around, and time, efficiency, or client desires are more important than taking the time to grade or correct images, there is no benefit to shooting video in LOG formats. LOG, like DNG (or RAW) will simply slow the process. However, if images or video are to be matched to other camera systems, or when quality is more important than the time required to achieve the best possible image, then LOG should be used, to future-proof and preserve the best original integrity of archived footage. Of particular consideration are higher resolution formats, such as 2.7K, 4K, 6K, or 8K video. These formats will be most likely downsampled to HD for most delivery in the near future, and shooting in LOG allows for greatest re-use, or color preservation when down sampling. Without getting too deeply into the math of it, the 4:2:0 colorspace captured in a 4K or higher format will be 4:2:2 color sampled when delivered in HD, enabling significant opportunity in post-processing.
“Which is more committed to breakfast, the chicken or the pig? Baking colors into recorded video is limiting, and if appropriate, should be avoided.”
CAN I SEE THE FINAL OUTPUT BEFORE COMMITTING TO LOG?
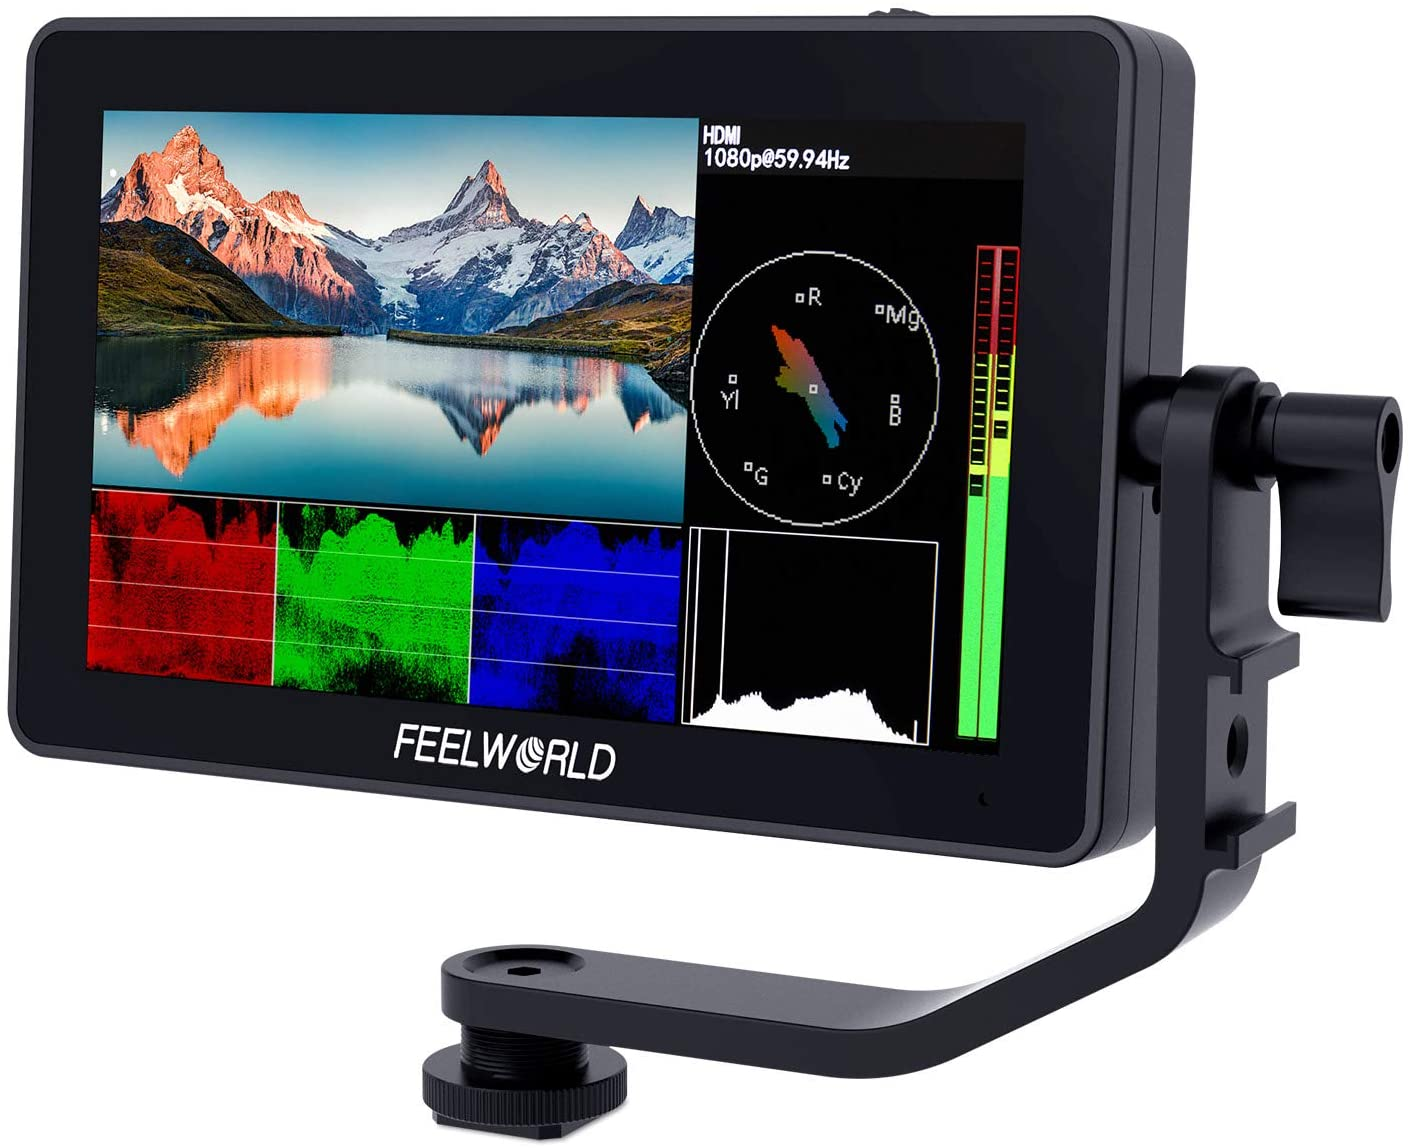
Many monitors today allow for input LUT preview prior to, and during the recording process. This will require some sort of HDMI (or SDI) output from the UA camera into the monitor.

Input LUTs can be applied temporarily for monitoring only, or they can be burned into files for use in editing when capturing Blackmagic RAW (when using BMD products). Bear in mind, once a LUT has been “baked in” to the recorded video, it cannot be removed and is very difficult to compensate.

Most external monitors allow shooters/pilots to store LUTs on the monitor, which offers confidence when matching a UA camera to a terrestrial or other camera. In our case, matching a Sony A7III to the UA is relatively easy as we’re able to create camera settings on either camera while viewing through the LUT-enabled monitor, seeing the same LUT applied (virtually) to both cameras.
Another method of seeing how a LUT will affect video can be found in LATTICE, a high-end, professional director and editors tool.
WHICH CONTAINER FORMAT?
Most UA cameras today are capable of recording in h.264 (AVC) or h.265 (HEVC). Any resolution beyond HD should be always captured in h.265. H.264/AVC was never intended to be a recording format for resolutions higher than HD, although some folks are happy recording 2.7K or 4K in the lesser efficient format. It’s correct to say that HEVC/h.265 is more CPU-intensive, and there are still a few editing and playback software apps that either cannot efficiently decode HEVC. However, the difference in file size/payload is significant, and quality of image is far superior in the HEVC format. A video created using HEVC at a lower bit rate has the same image quality as an h.264 video at a higher bit rate.
More importantly, AVC/h.264 does not support 10-bit video, whereas HEVC does, so not only are we capturing a higher quality image in a smaller payload, we’re also able to access 10bit, which can make a significant difference when correcting lower quality imagery, particularly in those pesky low light scenarios often found close to sunset, or night-flight images that may contain noise. Additionally, 10-bit in LOG format allows photographers to use a lower ISO in many situations, reducing overall noise in the low-light image. Last but not least, AVC does not support HDR, whereas HEVC does. Each camera is a bit different, and each shooting scenario is different, so a bit of testing, evaluation, and experience enables pilots to make informed decisions based on client or creative direction or needs.
HEVC IS SLOW ON MY COMPUTER!
Slower, older computers will struggle with the highly compressed HEVC format, particularly when 10-bit formats are used. Recent computer builds can decode HEVC on the graphics card, and newer CPUs have built-in decoding. However, not everyone has faster, newer computer systems available. This doesn’t mean that older computers cannot be used for HEVC source video.
Most editing systems allow for “proxy editing” where a proxy of the original file is created in a lower resolution and lower compression format. Proxy editing is a great way to cull footage to desired clips/edits. However, proxies cannot be color corrected with accurate results. The proxies will need to be replaced with source once edits are selected. In our house, we add transitions and other elements prior to compositing or color correcting. LUTs are added in the color correction stage.
| 10-bit A-LOG, no LUT applied | 10-bit A-LOG, LUT-only applied |
| 10-bit A-LOG, LUT applied, Graded | 10-bit A-LOG, LUT applied, Graded Split Screen |
Click Here to view the “Transcend” video displayed above. It is a mix of high end, DLSR, and UA cameras, captured prior to sunrise. Using 10-bit A-Log in h.265 format allowed a noise-free capture. The video received a Billboard Music award. We are grateful to Taras Shevchenko & Gianni Howell for allowing us to share the pre-edit images of this production.
WRAP UP
Shooting LOG isn’t viable for every production, particularly low-paying jobs, jobs that require rapid turnaround, or in situations where the matched cameras offer equal or lesser quality image output. However, if artistic flexibility is desired, or matching high end, cinema-focused cameras, or when handing footage over to an editor who requires flexibility for their needs, then HEVC in 10-bit, LOG-mode is the right choice.
In any event, expanding production knowledge and ability benefits virtually any workflow and professional organization, and is a powerful step to improving final deliverables.

Leave a Reply